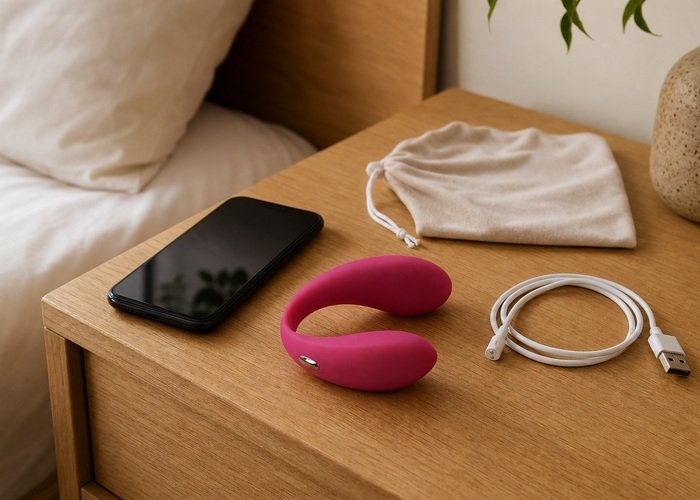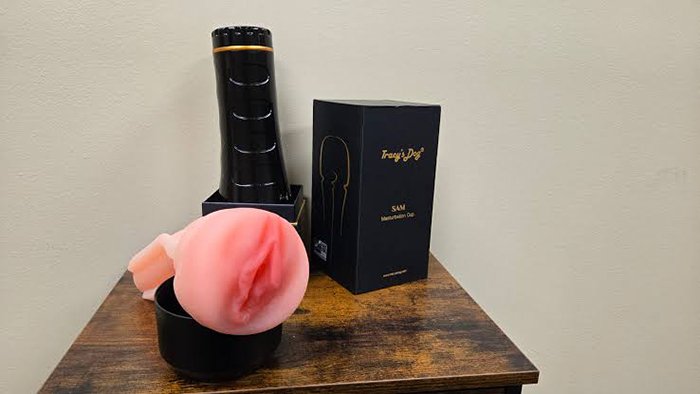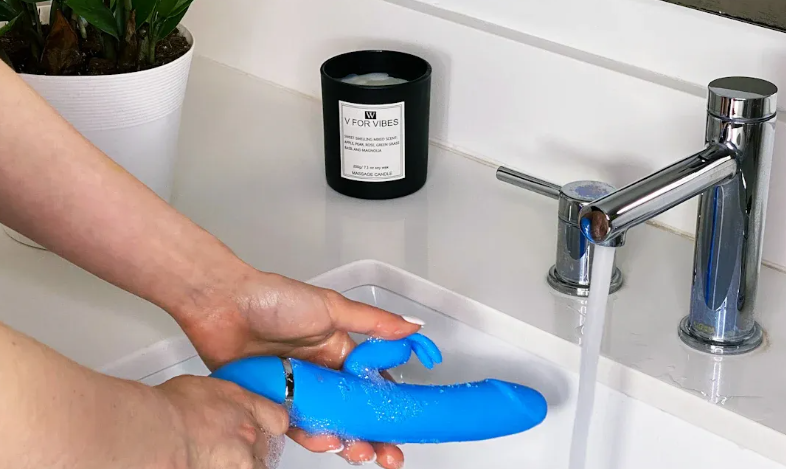
To clean and maintain your nipple suckers, wash them thoroughly after each use with warm water and a gentle, safe cleanser. Prioritize safety and hygiene by inspecting for damage before and after cleaning. You keep your experience comfortable when you care for your products properly. Nipple suckers work well for beginners and experienced users because they offer control and versatility. Get Knowledgeable about proper cleaning methods to explore new sensations with confidence and peace of mind.
Key Takeaways
- Clean nipple suckers after each use with warm water and mild soap to prevent bacteria buildup.
- Inspect your nipple suckers regularly for damage to ensure safety and comfort during use.
- Avoid sharing nipple suckers to reduce the risk of cross-contamination and infections.
- Store nipple suckers in a clean, dry container to protect them from dust and moisture.
- Use gentle cleaning tools and agents to maintain the integrity of the materials and prevent irritation.
- Deep clean your nipple suckers weekly to remove stubborn residues and ensure optimal hygiene.
- Replace nipple suckers if you notice cracks, discoloration, or reduced suction to maintain performance.
- Follow a consistent maintenance routine to extend the lifespan of your nipple suckers and enhance your experience.
Why Clean Nipple Suckers
Health Benefits
You protect your health when you clean nipple suckers regularly. Contaminants such as bacteria and mold can accumulate on surfaces that touch sensitive skin. If you neglect cleaning, you increase the risk of infections, especially when sharing equipment. You should always wash each component with a gentle detergent, rinse thoroughly, and dry completely. This routine removes harmful residues and keeps your skin safe.
Tip: Designate your nipple suckers for personal use only. Sharing increases the risk of cross-contamination, even among close partners.
Consider a case where a user developed irritation after using a poorly cleaned device. The discomfort lasted several days and required medical attention. You avoid such outcomes by maintaining strict hygiene. Social media communities often discuss the importance of cleaning routines, with many users reporting fewer skin issues after adopting proper care.
Key infection prevention practices:
- Wash with mild detergent after each use
- Rinse thoroughly to remove all soap
- Dry completely before storage
- Avoid sharing with others
Product Longevity
You extend the lifespan of your nipple suckers with consistent cleaning. Residual buildup, such as milk film or body oils, can degrade materials over time. Mold and bacteria not only pose health risks but also cause odors and reduce suction performance. You prevent these issues by cleaning after every session.
| Cleaning Frequency | Expected Lifespan | Common Issues Prevented |
|---|---|---|
| After every use | 1-2 years | Mold, odor, suction loss |
| Weekly | 6-12 months | Buildup, discoloration |
| Rarely | <6 months | Cracking, contamination |
You notice that regular cleaning keeps your device looking new and functioning well. If you store your nipple suckers without cleaning, you may find sticky residue or unpleasant smells. These signs indicate that the product may not last as long as intended.
Comfort and Performance
You experience greater comfort and reliable performance when you maintain your nipple suckers. Clean surfaces feel smooth and gentle against your skin. Dirt or residue can cause friction, leading to irritation or reduced sensation. You want consistent suction and a pleasant experience every time.
Note: Proper cleaning ensures that suction mechanisms work efficiently. You avoid leaks and weak performance by keeping all parts free from debris.
Many users report improved comfort after switching to a strict cleaning routine. You may find that sensations become more enjoyable and predictable. Clean devices also reduce the risk of allergic reactions, especially if you have sensitive skin.
You support your health, extend product life, and enhance comfort by making cleaning a regular part of your routine. You set yourself up for safe, satisfying experiences every time.
Materials Needed
Cleaning Supplies
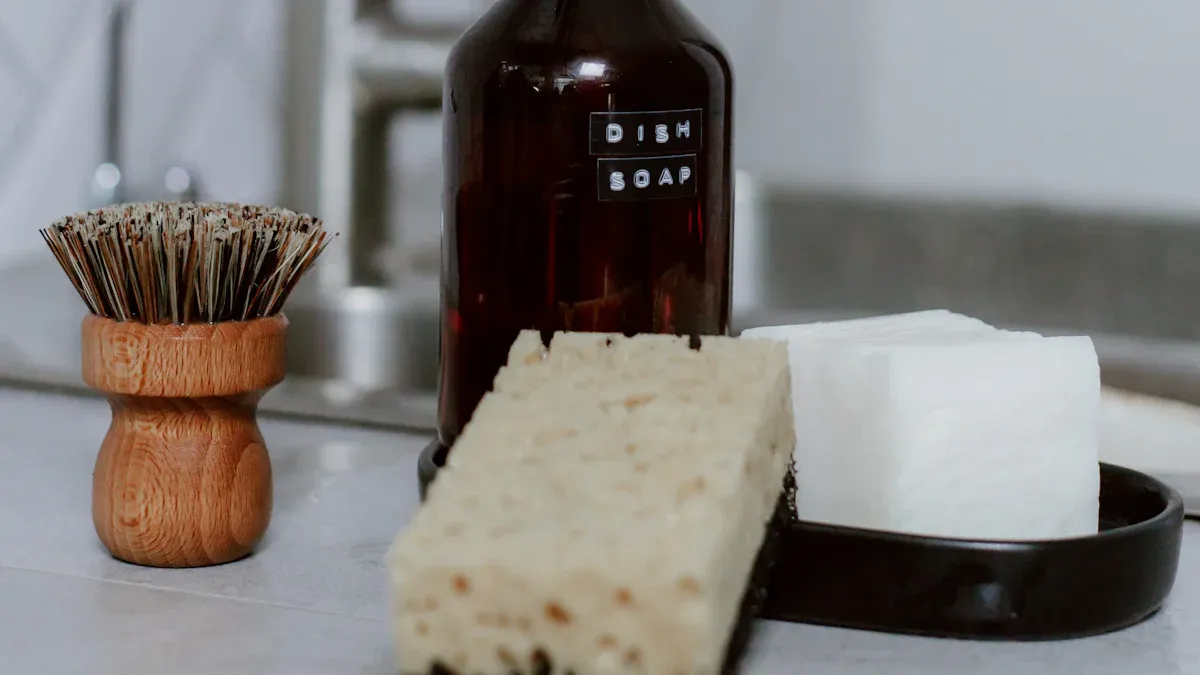
You need the right cleaning supplies to maintain your nipple suckers and protect your health. Choose tools that reach all surfaces and crevices. Use gentle brushes and sanitizing bags to ensure thorough cleaning. The following table summarizes recommended supplies and their uses:
| Cleaning Supply | Description |
|---|---|
| Microwave Steam Sanitizing Bags | Remove 99.9% of microbes; reusable up to 30 times; sanitize nipple suckers and accessories. |
| Non-Metal Bottle Brush | Clean inside and outside surfaces; gentle on silicone and plastic; safe for use in steam bags. |
| AccuBrush™ | Designed for delicate interiors; fits in steam bags; ensures gentle cleaning for small components. |
You can use a bottle brush to scrub hard-to-reach areas. Steam sanitizing bags work well for quick, effective disinfection. Always inspect your cleaning tools for wear and replace them when bristles fray or bags lose integrity.
Tip: Clean your nipple suckers immediately after use to prevent residue buildup and make cleaning easier.
Safe Agents
You must select cleaning agents that protect both your skin and the product material. Use warm water and mild soap for daily cleaning. Disassemble your nipple suckers before washing. Place silicone and stainless steel parts in boiling water for five minutes to achieve deep hygiene. You can also use the top rack of your dishwasher for most components, except metal parts in microwave sterilizers.
After cleaning, rinse thoroughly to remove all soap residue. This step prevents skin irritation and maintains suction performance. Electric sterilizers offer another safe option for regular disinfection.
Note: Always check the manufacturer’s instructions for compatibility with boiling or dishwashing. Some materials may warp or discolor if exposed to high heat.
What to Avoid
You must avoid substances that damage your nipple suckers or harm your skin. Some cleaning agents strip away natural lubrication, leading to dryness and cracking. The following list highlights items you should never use:
- Soap or shampoo on your nipples
- Harsh chemical cleaners (bleach, alcohol, acetone)
- Abrasive sponges or brushes
- Scented detergents with strong fragrances
If you use harsh chemicals, you risk degrading silicone, plastic, or metal components. Abrasive tools scratch surfaces, creating places for bacteria to hide. Scented products may cause allergic reactions or leave residues that irritate sensitive skin.
Alert: Never use boiling or microwave sterilization for metal parts in microwave sterilizers. This can cause warping or damage.
You protect your health and extend the life of your nipple suckers by choosing the right supplies and agents. Avoid harmful substances and inspect your tools regularly. This routine ensures safe, comfortable experiences every time.
Cleaning Steps
Prep and Inspect
Before you begin cleaning, inspect your nipple suckers for signs of wear or damage. This step helps you maintain safety and product longevity. You should look for changes in texture, stickiness, or any visible holes. If you notice any of these issues, discard the product immediately to prevent skin irritation or infection.
- Regularly inspect for wear and tear.
- Replace if the material feels soft or sticky.
- Discard if you find holes, tears, or changes in texture.
Disassemble
Disassemble your nipple suckers into their individual components. Separate any removable parts, such as suction bulbs or covers. This process allows you to clean each piece thoroughly and prevents residue buildup in hidden areas. You avoid missing spots that could harbor bacteria.
Rinse
Rinse each part under warm running water. This step removes surface debris and prepares the device for deeper cleaning. You should ensure water flows through all crevices and openings. If you use nipple covers, rinse them gently to avoid damaging the adhesive.
Wash by Material
Cleaning methods vary based on the material of your nipple suckers. You must Get Knowledgeable about the specific care instructions for each type to maintain performance and safety.
| Material Type | Cleaning Instructions | Key Considerations |
|---|---|---|
| Silicone | Use mild, fragrance-free soap and lukewarm water. Gently rub to remove residue. | Avoid harsh chemicals and abrasive cleansers to maintain texture and color. Pat dry with a soft cloth. |
| Plastic | Wash with gentle soap and warm water. Use a soft brush for crevices. | Avoid boiling and abrasive tools. Dry thoroughly to prevent mold. |
| Glass/Metal | Clean with mild soap and warm water. Rinse well and dry with a lint-free cloth. | Inspect for chips or cracks. Avoid sudden temperature changes to prevent breakage. |
| Nipple Covers | Wash with mild soap and warm water, air dry before applying a protective liner. | Avoid abrasive beads and stringent chemicals to keep adhesive effective. Rinse thoroughly and reapply protective liner after cleaning. |
Silicone
Clean silicone nipple suckers with mild, fragrance-free soap and lukewarm water. Gently rub the surface to remove any residue. Pat dry with a soft cloth to prevent wear. Store in a designated container to protect from dust and moisture. Regularly inspect for damage and avoid direct sunlight, which can degrade the material.
Plastic
Wash plastic nipple suckers using gentle soap and warm water. Use a soft brush to reach inside crevices. Avoid boiling plastic parts, as high heat can cause warping. Dry each piece thoroughly to prevent mold growth. Store in a cool, dry place.
Glass/Metal
Clean glass and metal nipple suckers with mild soap and warm water. Rinse well to remove all soap residue. Dry with a lint-free cloth to prevent water spots. Inspect for chips or cracks before each use. Avoid exposing glass or metal to sudden temperature changes, which can cause breakage.
Deep Clean
You should deep clean your nipple suckers regularly, especially if you use them frequently or share them with a partner. Deep cleaning removes stubborn residues and reduces the risk of infection.
Boil
Boiling is an effective method for deep cleaning silicone nipple suckers. Place non-motorized, 100% pure silicone parts in boiling water for five minutes. This process kills most viruses, bacteria, and pathogens, but it does not sterilize the device completely. Boiling pasteurizes the toys, reducing harmful microorganisms. Only boil silicone products that are safe for high temperatures. Never boil plastic, glass, or metal parts unless the manufacturer confirms they are heat-resistant.
Note: Always check the manufacturer’s instructions before boiling. Boiling can damage some materials.
Toy Cleaner
Use a specialized toy cleaner for materials that cannot be boiled. Apply the cleaner according to the instructions, ensuring you reach all surfaces. Rinse thoroughly to remove any residue. Toy cleaners offer a convenient alternative for deep cleaning and help maintain the integrity of your nipple suckers.
Tip: Get Knowledgeable about which cleaning methods suit your nipple suckers. Proper deep cleaning extends product life and keeps your experience safe.
You maintain hygiene and comfort by following these cleaning steps. Real-world users report fewer skin issues and longer product lifespans when they clean and inspect their nipple suckers regularly. You set yourself up for safe, satisfying experiences every time you Get Knowledgeable about proper care.
Drying and Storage
Drying Methods
You protect your nipple suckers from bacterial growth when you dry them properly. After cleaning, shake off excess water from each component. Lay the parts on a clean, dry towel in a well-ventilated area. Air drying usually takes 10 to 15 minutes if you use very hot water and shake the pieces well. For a faster process, use a dedicated sterilizer or dryer machine. These devices can dry your nipple suckers in as little as 45 minutes and reduce the risk of moisture-related contamination.
- Shake off excess water after rinsing.
- Lay components flat on a clean towel.
- Use a sterilizer/dryer machine for quicker results.
- Avoid stacking wet parts to prevent trapped moisture.
A user shared their routine on a health forum:
“I always shake my nipple suckers after washing, then spread them out on a towel. If I need them quickly, I use my dryer machine. I never put them away wet, and I haven’t had any issues with mold.”
Storage Tips
You extend the life of your nipple suckers when you store them correctly. Always ensure every part is completely dry before storage. Place the dry components in a clean, dry container or a sealed bag. This method prevents dust, moisture, and bacteria from contaminating your devices. Avoid storing nipple suckers in humid environments, such as bathrooms, where mold can develop.
| Storage Method | Protection Level | Convenience | Risk of Contamination |
|---|---|---|---|
| Sealed Bag | High | Moderate | Low |
| Clean Container | High | High | Low |
| Open Shelf | Low | High | High |
| Bathroom Cabinet | Moderate | High | Moderate |
You can keep a small, dedicated box in your bedroom drawer for easy access. Some users prefer sealed bags for travel, which offer extra protection against environmental contaminants.
Prevent Contamination
You minimize contamination risks by following a few key steps. Rinse all parts thoroughly to remove any residue before storage. Make sure every piece is completely dry. Store your nipple suckers in a sealed bag or container to block out dust and bacteria. Never store wet or damp parts, as moisture encourages mold and bacterial growth.
- Rinse parts to remove all residue.
- Dry components fully before storing.
- Use sealed bags or containers for storage.
- Keep storage areas clean and dry.
Tip: Regularly check your storage container or bag for signs of moisture or dirt. Replace it if you notice any buildup.
You maintain hygiene and product quality by adopting these drying and storage practices. Proper care ensures your nipple suckers remain safe, comfortable, and ready for use whenever you need them.
Get Knowledgeable: Nipple Sucker Safety
Safe Use Tips
You ensure a safe and enjoyable experience when you follow expert guidance on nipple sucker use. Sexual health professionals recommend a gradual approach, especially if you are a beginner. Start with minimal suction and allow your body to adjust before increasing intensity. This method reduces discomfort and helps you understand your sensitivity levels.
- Begin slowly. Apply gentle suction and wait for your body to respond.
- Limit your first sessions to 3–5 minutes. This prevents soreness and allows your skin to adapt.
- Clean your nipple suckers thoroughly after each use with warm water and mild soap.
- If you feel pain or discomfort, reduce suction or take longer breaks between sessions.
Tip: Listen to your body. If you notice redness or swelling, pause use and reassess your technique.
A first-time user shared on a health forum:
“I started with just a few minutes and low suction. Over time, I found what felt best for me. Cleaning after every use made a big difference in comfort.”
Injury Prevention
You protect your skin and avoid complications by practicing proper injury prevention. Clinical studies show that nipple injuries can occur frequently, especially during the early stages of use or breastfeeding. Up to half of users may experience some form of irritation or injury if they do not take precautions. Friction, excessive suction, or prolonged use often cause these issues.
You can minimize risks by following these steps:
- Use nipple suckers for short periods, especially when starting out.
- Check your skin for signs of irritation or damage before and after each session.
- Allow time for healing if you notice soreness or broken skin.
- Consider using protective barriers, such as breast shells, to reduce friction and promote healing.
A user who experienced discomfort reported:
“I noticed soreness after a long session. Taking a break and using a protective barrier helped my skin recover quickly.”
| Common Issue | Prevention Strategy | Recovery Tip |
|---|---|---|
| Soreness | Limit session duration | Take breaks, moisturize |
| Redness/Irritation | Start with low suction | Use protective barriers |
| Cracking | Inspect before each use | Allow time to heal |
Sharing Precautions
You reduce the risk of infection when you follow strict hygiene protocols, especially if you share nipple suckers with a partner. Proper cleaning and handling are essential for safety.
- Discard any expressed breast milk from an affected breast until all lesions heal.
- Feed only from the unaffected breast if lesions are covered.
- Wash your hands thoroughly before and after handling nipple suckers.
Alert: Never share uncleaned nipple suckers. Even among close partners, bacteria and viruses can transfer easily.
You maintain a safe environment by following these precautions. Get Knowledgeable about the risks and best practices to ensure every experience remains healthy and enjoyable.
Get Knowledgeable: Choosing and Maintaining
Selection Tips
You make informed choices when you evaluate nipple sucker designs before purchasing. Consider the stiffness and flow rate of each product. These features influence comfort, safety, and overall user experience. Research shows that design affects sucking physiology and feeding efficiency. For example, a lower flow rate can reduce the risk of aspiration, but it may also challenge your ability to coordinate sensory and motor functions. You should select a nipple sucker that matches your sensitivity level and intended use. If you are a beginner, start with a softer material and moderate suction. Experienced users may prefer firmer designs with adjustable suction for more control.
| Feature | Benefit | Consideration |
|---|---|---|
| Stiffness | Enhanced control | May cause discomfort if too firm |
| Flow Rate | Safer, reduces aspiration risk | Lower rates may slow feeding |
| Suction Strength | Customizable experience | Excessive suction can cause irritation |
| Material Type | Skin-friendly, easy to clean | Some materials require special care |
Tip: Get Knowledgeable about product specifications by reading user reviews on social media platforms. Many users share their experiences with different designs, helping you choose the best option for your needs.
Maintenance Routine
You extend the life of your nipple suckers by following a consistent maintenance routine. Clean your device after every use with warm water and mild soap. Inspect each component for cracks, tears, or discoloration. Dry all parts thoroughly before storing them in a clean container. Schedule a deep clean weekly using boiling water or a specialized toy cleaner, depending on the material. Track your cleaning habits with a simple checklist to ensure you never miss a step.
| Maintenance Task | Frequency | Purpose |
|---|---|---|
| Daily Cleaning | After use | Removes residue, prevents bacteria |
| Weekly Deep Clean | Weekly | Eliminates stubborn buildup |
| Inspection | Weekly | Detects wear and tear |
| Storage Check | Monthly | Prevents contamination |
Note: Get Knowledgeable about the manufacturer’s care instructions. Some materials require specific cleaning agents or methods to maintain their integrity.
Replacement Signs
You protect your health and maintain performance by replacing nipple suckers at the right time. Regular inspection helps you spot issues early. Look for visible signs of wear, such as cracks or discoloration. A decrease in suction power or milk output signals that the device no longer functions properly. Many users report a decline in performance after several months of use. Replace your nipple suckers if you notice any of the following:
- Cracks, tears, or discoloration in components
- Reduced suction power
- Decline in milk production
- Sticky or soft texture
- Persistent odors after cleaning
Alert: Do not ignore these signs. Using damaged nipple suckers increases the risk of irritation and infection.
You ensure safe, comfortable experiences by choosing the right product, maintaining a regular care routine, and replacing devices when necessary. Get Knowledgeable about these practices to enjoy reliable performance and peace of mind.
Quick Care Checklist
Maintaining your nipple suckers requires a consistent routine. You protect your health and extend product life when you follow a structured care plan. Use this checklist to keep your devices clean, safe, and ready for use.
Daily Tasks
You should complete these tasks every day to maintain optimal hygiene and comfort:
- Rinse nipples with warm water several times daily. This step removes saliva and reduces the risk of irritation.
- Apply an unscented moisturizer after rinsing. You keep skin soft and prevent dryness.
- Wash breasts during your daily shower. Use natural, gentle, baby-approved soaps to avoid harsh chemicals.
- Wash hands and forearms frequently, especially before handling nipple suckers or feeding. You minimize bacteria transfer and protect sensitive skin.
- Inspect nipple suckers for visible residue or damage before and after each use.
- Clean nipple suckers with warm water and mild soap immediately after use. Dry thoroughly before storage.
Tip: Many users report fewer skin issues when they rinse and moisturize regularly. One user shared, “I started rinsing with warm water after every session and noticed less redness and irritation.”
Weekly/Monthly Tasks
You maintain long-term safety and performance by scheduling deeper cleaning and inspection tasks:
| Task | Frequency | Purpose |
|---|---|---|
| Deep clean with boiling water or toy cleaner | Weekly | Remove stubborn residue and bacteria |
| Inspect for cracks, tears, or discoloration | Weekly | Detect wear and prevent irritation |
| Check suction performance | Weekly | Ensure reliable function |
| Clean and sanitize storage container/bag | Monthly | Prevent contamination from dust or mold |
| Replace nipple suckers if damaged | As needed | Maintain safety and comfort |
You should deep clean your nipple suckers once a week. Use boiling water for silicone parts or a specialized toy cleaner for other materials. Inspect each component for signs of wear, such as cracks or sticky texture. Test suction strength to confirm proper function. Clean your storage container or bag monthly to remove dust and moisture. Replace any nipple suckers that show damage or persistent odors.
Note: Consistent weekly and monthly care prevents buildup and extends the lifespan of your devices. Users who follow this routine report fewer problems and greater satisfaction.
You ensure safe, comfortable experiences by following this checklist. Regular care keeps your nipple suckers hygienic and ready for use whenever you need them.
You maintain safety and comfort when you clean nipple suckers before and after each use. Regular cleaning prevents infections, irritation, and allergic reactions. Devices made from body-safe materials with detachable parts offer easier sterilization.
- Clean with mild soap and warm water.
- Inspect for damage and dryness.
- Store in a clean, dry container.
| Situation | Strategy |
|---|---|
| Weak sucking reflex | Produce milk rhythmically without choking. |
| Collapsed nipple during sucking | Pull back or rotate the nipple if milk does not flow. |
| Child cries during insertion | Stimulate the sucking reflex or feed during active sleep. |
You explore new sensations responsibly when you follow these steps. Enjoy your experience with confidence and knowledge. 😊
FAQ
How often should you clean nipple suckers?
You should clean nipple suckers after every use. This routine prevents bacteria buildup and keeps your device safe for sensitive skin. Weekly deep cleaning helps maintain optimal hygiene and performance.
Can you sterilize nipple suckers in boiling water?
You can sterilize silicone nipple suckers by boiling them for five minutes. Avoid boiling plastic, glass, or metal unless the manufacturer confirms they are heat-resistant. Always check care instructions before using high temperatures.
What should you do if nipple suckers develop an odor?
You should deep clean the device with boiling water or a specialized toy cleaner. Persistent odors may indicate mold or residue. If the smell remains after cleaning, replace the nipple suckers to protect your health.
Is it safe to share nipple suckers with a partner?
You should avoid sharing nipple suckers. Sharing increases the risk of cross-contamination and infection. If you must share, clean and disinfect the device thoroughly before and after each use.
How do you store nipple suckers to prevent contamination?
You should dry all parts completely and store them in a clean, sealed container or bag. Keep storage areas dry and free from dust. Avoid humid environments, such as bathrooms, to reduce mold risk.
What signs indicate you need to replace nipple suckers?
You should replace nipple suckers if you notice cracks, tears, discoloration, reduced suction, or persistent odors. Damaged devices can cause irritation or infection. Regular inspection helps you spot issues early.
Can you use regular soap to clean nipple suckers?
You should use mild, fragrance-free soap for cleaning. Harsh chemicals, scented detergents, and abrasive tools can damage materials and irritate skin. Always rinse thoroughly to remove all soap residue.
What should you do if you experience irritation after use?
You should stop using the device and inspect for damage. Clean your skin gently with warm water. Allow time for healing before resuming use. If irritation persists, consult a healthcare professional.